The stock firmware of the Nano receiver and TX module manufactured by Betafpv is ELRS V1.0.0-RC5(the fifth release candidate version) and the Lite receiver and Micro TX Module is V2.0.0 ; ELRS Innovative team has officially released the first major version V2.4.0 . High recommend upgrading the TX modules and receivers' to the 2.4.0version that is also able to bind with F4 1S 12A AIO Brushless Flight Controller and F4 1S 5A AIO Brushless Flight Controller (ELRS 2.4G)
Note:
1. TX module and receiver have to be in the same ELRS version, otherwise, the binding will fail.
2. Nano TX module does NOT support upgrades via WiFi. Please use the ExpressLRS Configurator to upgrade the firmware.
There are two ways to flash ExpressLRS, via WiFi or ExpressLRS Configurator. The recommended way is to use ExpressLRS Configurator. Here is the manual for pilots to flash the firmware to the BETAFPV TX module and receiver via ExpressLRS Configurator.
Install ExpressLRS Configurator
Download the latest ExpressLRS Configurator application for your platform. Install ExpressLRS Configurator and open it.
Flash Receiver
We use the Betaflight passthrough function to flash the ELRS receiver. Please follow the steps below one by one.
Step1:Preparing for Passthrough Flashing
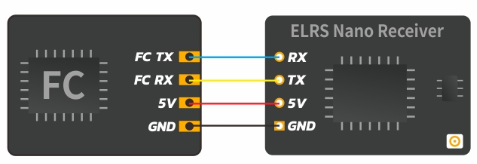
Make sure that your FC is wired with the ERLS receiver correctly as shown below. Connect Rx to a Tx pad on the FC and Tx to an Rx pad on the FC. Don't forget to also wire up 5V and GND.
Connect this FC to USB and configure the FC firmware via Betaflight Configurator as shown in section "Serial RX Setup" and "Protocol".
Step2:Flashing via Passthrough
Now close the Betaflight Configurator. Connect this FC to USB and open the ExpressLRS Configurator.
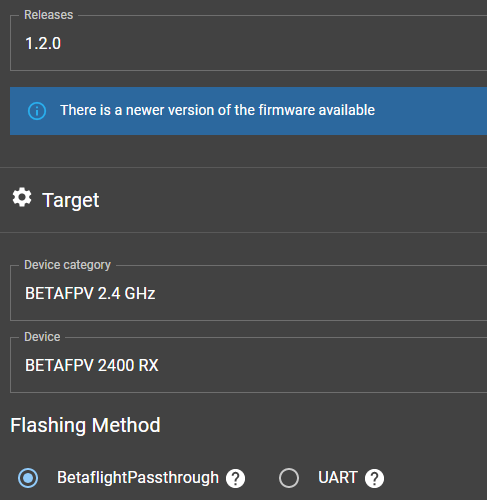
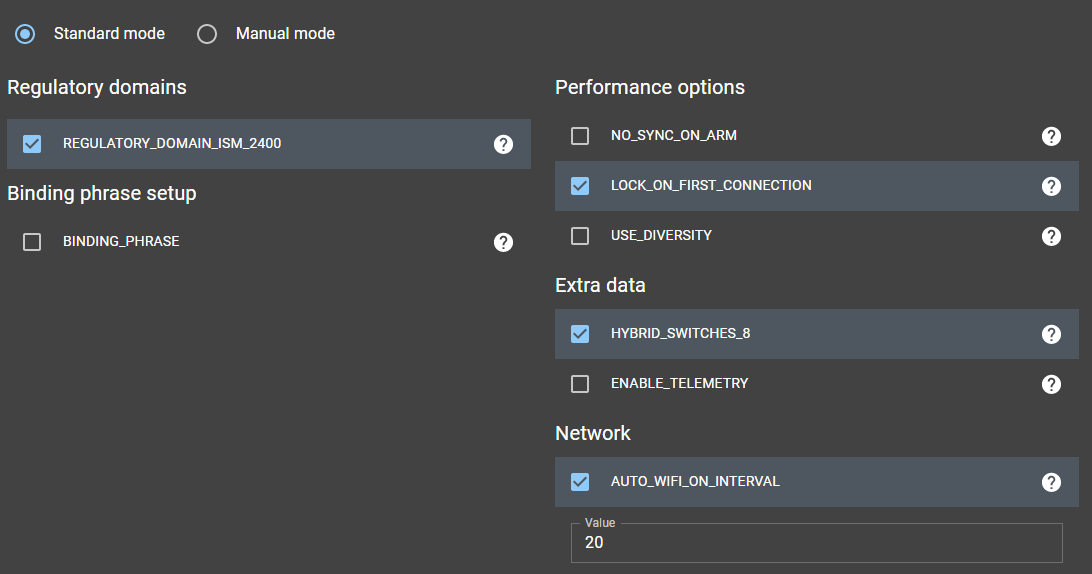
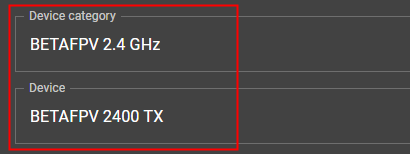
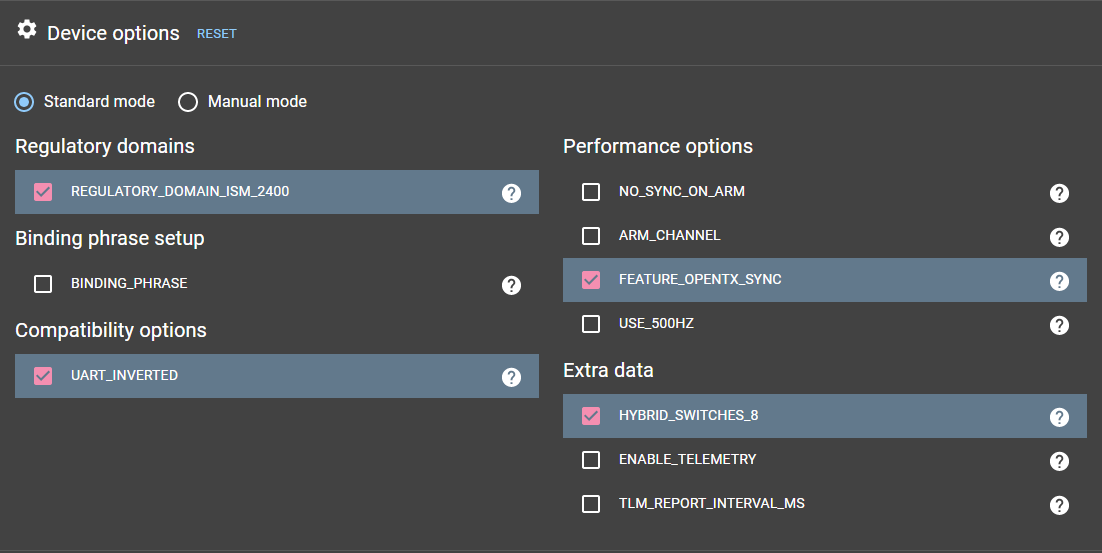
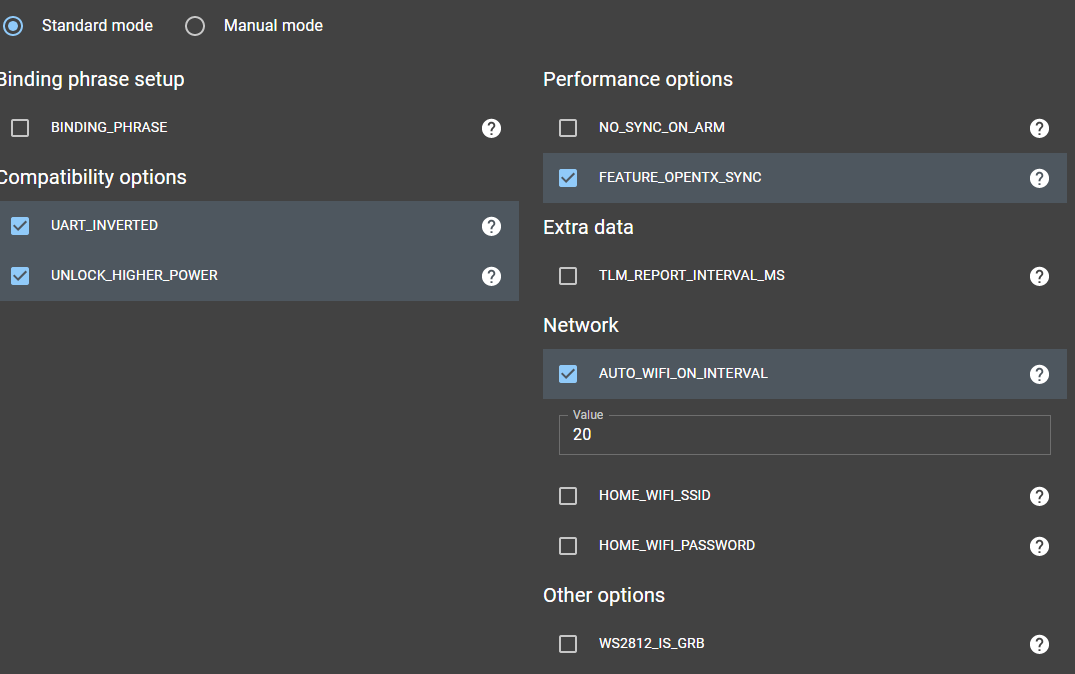
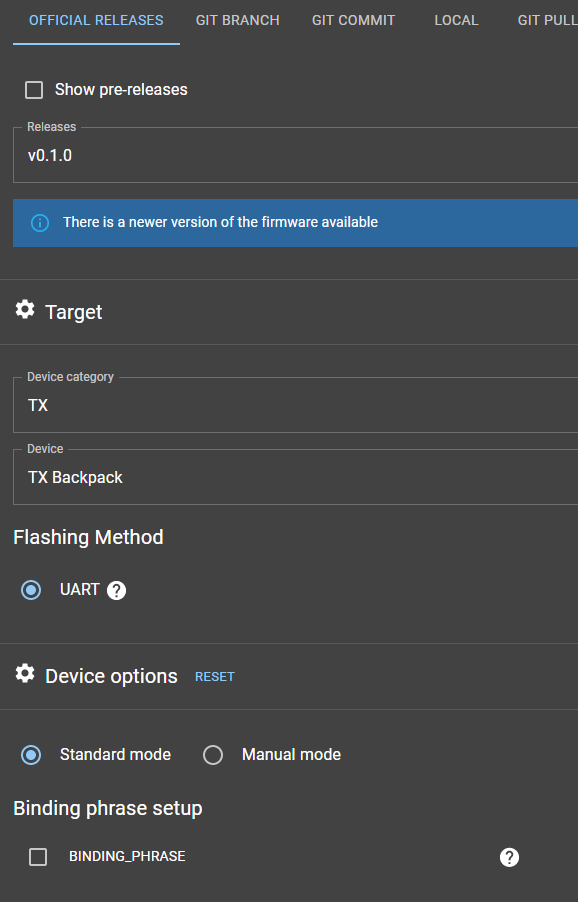
Please select the corresponding target and set your firmware options in ExpressLRS Configurator as shown below (take the 2.4G version for example).
Then click Build and Flash. For first-time flashing/updating, it would normally take a while. A Success message will be shown once the process is complete.
Step3:Flashing via Wifi:
This method especially applies to the Lite receiver, due to the pre-factory firmware(V2.0.0) is compiled by our companies, if the polites want to update the receiver please flash it via Wifi as steps below,the new firmware supports the V2.4.0 TX module. 1. Power on the receiver and wait for 60 seconds. The LED light of the receiver will flash, indicating that it has entered WIFI mode. Then turn on the WIFI of the computer, find Wifi named:ExpressLRS RX, and input the password ”expresslrs“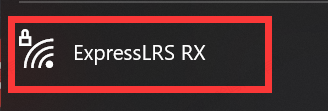 2. Enter http://10.0.0.1/ in your Google browser after you connect to the Wifi, then select the files for your receiver click update after a few seconds a Success message will be shown once the process is complete. If there is a firmware upgrade conflict, there will be a prompt to confirm the firmware, click "Flash anyway" to force the flash.
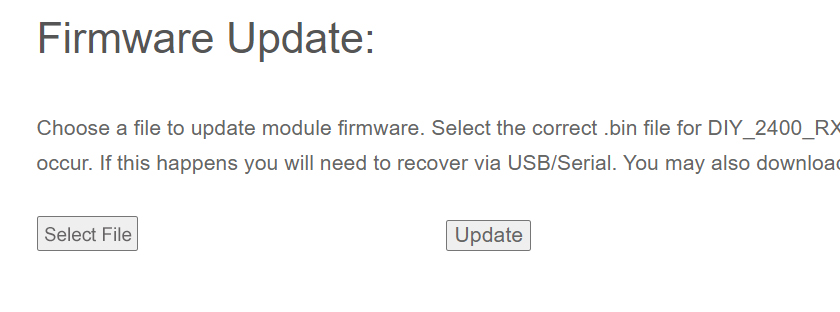

Pilots could check the sector "Flashing via Passthrough" and chapter Firmware Options on ExpressLRS Quick Start for more details.
Note: The operation to upgrade the firmware of the built-in ELRS 2.4G receiver for F4 1S 12A AIO Brushless Flight Controller is the same as above. Pay attention to use the stock cli of this FC board to prepare for passthrough flashing. Here is the Youtube manual for you.
Flash TX Module
Attach a USB Data Cable to ELRS TX module and Computer. Windows users might have to install CP210x Drivers to ensure the device is properly detected and initialized.
Nano TX Module
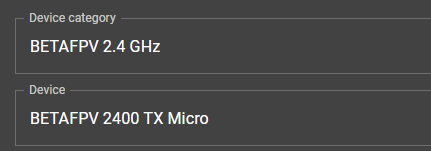
Please select the corresponding target and set your firmware options in ExpressLRS Configurator as shown below (use the 2.4G version Nano TX module for example).
Micro TX module and 1W Micro TX module
You could only flash version V2.0.0 firmware for the Micro TX module and 1W Micro TX module from the ExpressLRS Configurator currently
Attention:
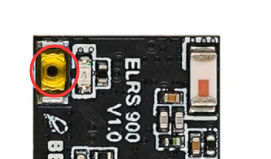
You need to dial up the DIP switch behind the 1W Micro TX module before updating:

Use the 2.4G version Micro TX module for example

Backpack update on 1W TX module
You could only flash version V0.1.0 firmware for the Backpack on 1W Micro TX module from the ExpressLRS Configurator currently, the flashing steps are shown below:

Hit Build & Flash. Wait for the process to finish, and you should be greeted with the "Success" message.
Note: Nano TX module does NOT support upgrades via WiFi. Please use the ExpressLRS Configurator to upgrade the firmware, as shown above.
Note: Please download the driver if you fail to choose a relative serial port during the flash process.

Here is the Youtube manual to upgrade the TX module.
Troubleshooting
- Turn off the Telemetry option is highly recommended for passthrough flashing on ELRS receiver or F4 1S 12A AIO board with built-in ELRS receiver.

-
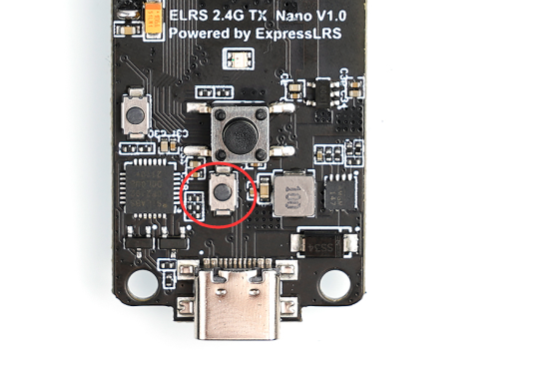
If the firmware in the receiver is corrupted (AKA soft-bricked), press the button on the receiver, then power on. Now you could release the button and flash via passthrough.
- The ExpressLRS Configurator works on the highest serial baud rate 460800. High recommend using the USB port from the mainboard directly on desktop computer, usually on the back of the computer case. The front panel USB port could not provide a stable connection at such a high baud rate as usual.
- If you still could not flash the firmware, please open the module case first, then press the button and connect the module to the computer next. Now you could release the button and try again.